Featured

    Featured Posts

    Social Icons

Loading...

How to Install Windows 7 Using USB Pendrive (Easiest Tutorial)

Install windows 7 using USB Pendrive


Learn How to Install Windows 7 in laptop/PC by using USB Pendrive.
Trust me guys, If you trying to install Windows first time then you’re landed on right place.
This is newbie friendly tutorial, Windows installation process is tricky but we made this tutorial especially for beginners who try to install windows the first time.
Here we’re providing the easiest step by step tutorial with screenshots.

Install windows7 using Pendrive is much easier as compared to install using CD/DVD drive.
Just Follow simple steps and you can install windows7 on your system very easily by using a USB Pendrive.

What you Need:

·        Bootable Pendrive  (At least 4GB )
You need to make your Pendrive bootable before proceeding further steps also make sure you have at least 4GB of Pendrive.
If you don’t know How to make Pendrive bootable, don’t worry you can make your Pendrive bootable very easily.

Ads
·        Windows 7 iso file/Extracted File in folders.
If you already have a windows 7 iso file, then skip this section and If you don’t have Windows 7 iso file, you can download from HERE.
Ads


Setting in Boot Menu:

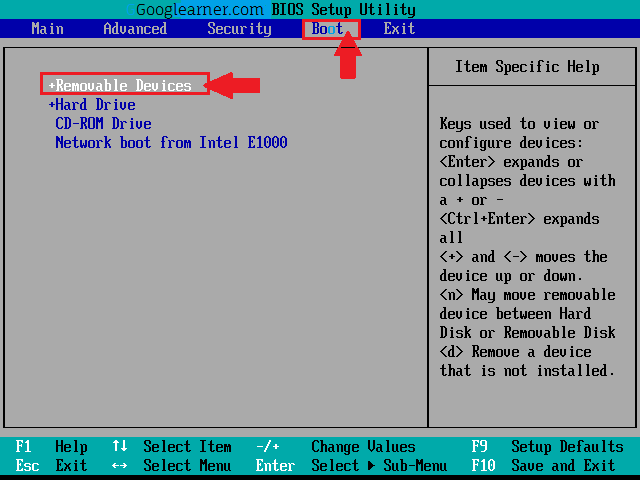
Change System Boot setting, set USB as a First Boot device.

1) Restart your Laptop/PC, when setting in starting process press 5-8 times
DEL, ESC, F2, F9, F10 (It is depending on your system’s motherboard, Find out whose key work in your system for going into boot menu).

Install windows 7 using USB Pendrive

2) Then Boot Menu will be open, Click on Boot tab.
3) Set USB/Removable drive as a First boot option.
That’s it, your boot setting is complete, Now we can start the installation process.


Now you have both two things which are required in this tutorial, Bootable Pendrive and Windows 7 iso file, so now we can start the windows installation process.

Follow Windows 7 Installation steps:
1) Copy windows iso File in bootable Pendrive.
2) Insert Pendrive in Laptop/PC.
3) Restart Your system.

Install windows 7 using USB Pendrive


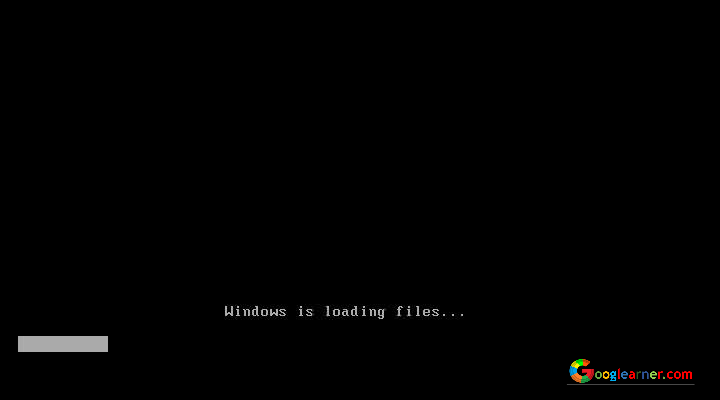
After System restart, If you see a window like this, then it’s mean your Laptop/PC is successfully accepting your Pendrive also start loading files for the installation process and now you can go for further steps.


Step #1   Then you’ll see a window like this.

Install windows 7 using USB Pendrive

·         Click on Install Now.


Step #2   Choose what type of Installation do you want?

Install windows 7 using USB Pendrive

·         Click on Custom (Advanced).

Step #3    Now you need to create a partition on your hard drive to allocate space for separated drives.
How you can create a partition on your drive, I’ll tell you.
For Example:
Select the Disk 0 contains 20GB of space (see in the image below).
Click on New and create a new drive.

NOTE: Allocate space for new drives in MB, not in GB.
1024MB = 1GB, For example, If create partition of 60GB then Allocate the size 60,000MB (round figure).

Install windows 7 using USB Pendrive


Install windows 7 using USB Pendrive

·         Click on Next.


Step #4   In this step, Windows start installing window files and what you need to do is “ just wait” until it's complete.
Note: Installing process is very sensitive, Make sure USB Pendrive don’t disconnect and Don’t even let the system switch off or restart.
Install windows 7 using USB Pendrive

·         When all files installed, then the system will take a Restart.


Step #5   Now all your hard work is done, Follow further steps which are very easy.
Choose a username for your account.
Install windows 7 using USB Pendrive

·         Click on Next.


Step #6    Now system asks for windows product key, If you don’t have a product key then just skip.
Install windows 7 using USB Pendrive

·         Click on Next.


Step #7   Now, Window will ask you to enter some desired details like Time Zone, Clock timing, Location and also choose your network as  Work, Public and Home set anyone according to your location.

Install windows 7 using USB Pendrive

·         Click on Next.


Congratulations !!! 
Now have Installed Windows successfully in your system. See your desktop, customize according to your use.
Install windows 7 using USB Pendrive

Enjoy..!!!

Having any Issues related to this tutorial, just comment below.
Share this article with your friends and also follow us by entering email for getting post alert directly on your email.

Wish Happy Birthday to your Special Friend in a creative style

Wish Happy Birthday to your Special Friend in a creative style.


Today we’re talking about wishing Happy Birthday to your Friend in a creative different style.
I have checked on the internet, I got Happy Birthday’s stuff like SMS wishes, photos, short template but I am unable to find a single piece of web page for Birthday wishes but Now I have created a Happy Birthday Complete Webpage containing lots of birthday wishes and also some funny stuff. You can send this Happy birthday web page link to your friend and I am damn sure after seeing this type of birthday wish your friend will be very happy to see this online presence.

As you can see this is a Happy Birthday Webpage designed in basic HTML coding so any newbie also can understand what codes used on this web page.
If you can understand HTML coding then you can modify this page for making it better, Its all depend on you.
So, Now you can wish Happy Birthday by sending the link of Birthday web page and everyone can view this link on the web.

Note: Don’t miss the Bonus section (It's important).

How to use this Webpage for wishing Happy Birthday, is this really a creative idea?
I am trying to give you the answer to this question in the easiest way, This is like online Birthday gift at the same time cool & creative birthday wish and also its free.
You can send this web page link to anyone who’s special for you, doesn’t matter how far is your friend, internet will do the rest of the work you need to do is just send link of this web page we’re providing and at this time everyone is on the internet but how many people talking about to wish Happy Birthday in this creative style.
Be the first one from all of them and wish a happy birthday to someone’s special and what you need to do is just send the link of the webpage and enjoy the phenomenal response from the other side.
Ads


Here is the Happy Birthday web page link you can send to your friend, check from HERE

Ads


I have Two Bonuses for you to make this Article complete.

Bonus 1: If you want to send this web page to someone’s special, You can leave a message in the comment box of this post by typing Friend’s name_Date.
For Example, My friend is Sonam Gupta and her birthday will be on 2-feb-2017, Then I’ll enter a message in comment box like this…
·         My request is for Sonam gupta_2-Feb-2017.
Then we’ll add the Sonam Gupta name on 2nd of Feb, this proves that this Birthday web page is only designed for Sonam Gupta, This step will help to make feel special to your friend, got it.

Bonus 2: If you have some knowledge of HTML, you can do modification according to your needs because we’re providing the HTML file of Birthday webpage.

Download from here

Ads


Conclusion: Googlearner, our all efforts and hard work is only for your convenience, take all the credits… means you can say, you have designed this birthday web page for making impression on your friend.

If you like this Article, please share because sharing is caring and also like us by following on social sites, our follow icons is on Top.
You can start commenting from now, we’re all set to spread Birthday wishes in a creative style.

Happy Birthday Gudiya Didi

Happy Birthday webpage

••••╠╣APPY•••• •••••BIRT╠╣DAY••••

With Best Wishes

πŸ“’Many Many Happy...Returns of the day....πŸ‡ πŸŽŠπŸŽ‰

°•°•Happy Birthday °•°•

image
Powered by Blogger.
© Copyright Bangladesh.ITC
Back To Top