Learn How to Install Windows 8 or 8.1 in laptop/PC by using USB Pendrive and what's the best part of the installation process, you don't need a single software in this tutorial.
Trust me guys, If you trying to install Windows first time then you’re landed on right place.
This is newbie friendly tutorial, Windows installation process is tricky but we made this tutorial especially for beginners who try to install windows the first time.
Here we’re providing the easiest step by step tutorial with screenshots.
Install windows8 or 8.1 using Pendrive is much easier as compared to install using CD/DVD drive.
Just Follow simple steps and you can install windows 8 or 8.1 on your system very easily by using a USB Pendrive.
What you Need:
· Bootable Pendrive (At least 4GB )
You need to make your Pendrive bootable before proceeding further steps also make sure you have at least 4GB of Pendrive.
If you don’t know How to make Pendrive bootable, don’t worry you can make your Pendrive bootable very easily.
· Windows 8 or 8.1 iso file/Extracted Files.
If you already have a windows 8 or 8.1 iso file, then skip this section and If you don’t have iso file, you can download windows 8 iso file from HERE and Windows 8.1 iso file from HERE.
Setting in Boot Menu:
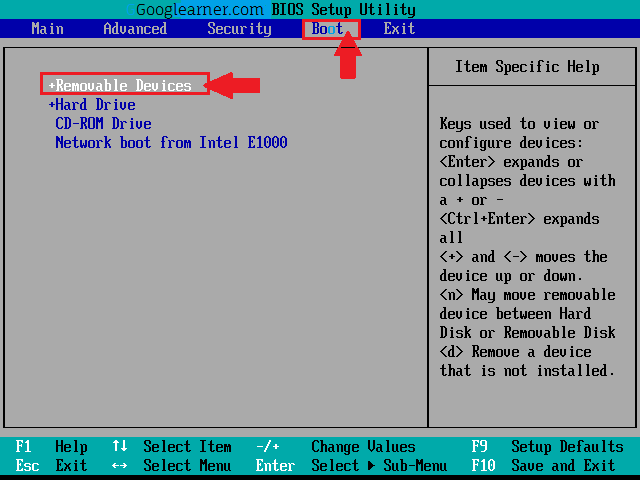
Change System Boot setting, set USB as a First Boot device.
1) Restart your Laptop/PC, when setting in starting process press 5-8 times
DEL, ESC, F2, F9, F10 (It is depending on your system’s motherboard, Find out whose key work in your system for going into boot menu).

2) Then Boot Menu will be open, Click on Boot tab.
3) Set USB/Removable drive as a First boot option.
That’s it, your boot setting is complete, Now we can start the installation process.
Now you have both two things which are required in this tutorial, Bootable Pendrive and Windows 8 iso file, so now we can start the windows installation process.
Follow Windows 8 or 8.1 Installation steps:
1) Copy windows iso File in bootable Pendrive.
2) Insert Pendrive in Laptop/PC.
3) Restart Your system.

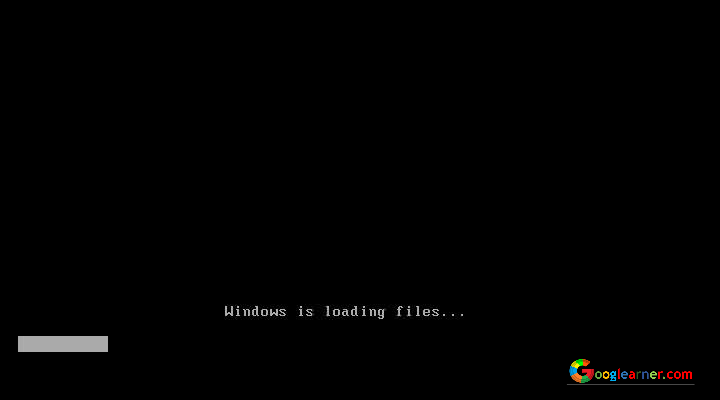
After System restart, If you see a window like this, then it’s mean you're on right path and your Laptop/PC is successfully accepting your Pendrive also start loading files for the installation process and now you can go for further steps.
Step #2 Now system asks for windows product key. This is not an optional step, you need to enter product key before proceeding further installation steps.
- Enter Product key, then click on Next.
Step #3 Read and accept the Microsoft license agreement, If you agreed with the terms of Microsoft then Tick the box.
- Tick the box, then click Next.
Step #4 Choose what type of Installation do you want?
· Click on Custom (Advanced).
Step #5 Now you need to create a partition on your hard drive for making drives separated and allocate space according to your needs.
How you can a create partition on your drive, I’ll tell you.
Select the Disk 0 contains 60GB of space (see in image below).
Click on New and create a new drive.
NOTE : Allocate space for new drives in MB, not in GB.
1024MB = 1GB,
For example, If create partition of 50GB then Allocate the size 50,000MB (round figure).
For example, If create partition of 50GB then Allocate the size 50,000MB (round figure).
- We're creating a partition of 30Gb (see in image below).
After clicking on New, We entered 30,000 mb because we need to create a partition of 30gb. Got it..!!!
· Click on Next.
Step #6 In this step, Windows start installing window files and what you need to do is “ just wait” until its complete.
This is long process, it takes 20min approximately.
Take Some Rest, What about a cup of Coffee.☕
This is long process, it takes 20min approximately.
Take Some Rest, What about a cup of Coffee.☕
Note : Installing process is very sensitive, Make sure Usb pendrive don’t disconnect and Don’t even let the system switch off or restart.
Step #7 Now all your hard work is done, Just wait while windows take a restart.
· Click on Restart Now.
Step #8 Windows gathering information from the system, wait until percentage will 100%, then one more time windows will take a restart automatically.
Step #9 Personalize your windows 8, choose your colours scheme and give a name to your PC.
This setting is changable, you can it anytime by going into windows 8 or 8.1 settings.
This setting is changable, you can it anytime by going into windows 8 or 8.1 settings.
· Click on Next.
Step #10 Now, Setting up your PC.
- Use Express Settings.
Step #11 Sign in to your PC.
- If you have a microsoft account just enter your E-mail and click on Next.
- If you don't have microsoft account just choose "Sign in without a microsoft account".
Congratulations !!!
Now have Installed Windows successfully in your system. See your desktop, customize according to your use.Enjoy..!!!
Having any Issues related to this tutorial, just comment below.
Share this article with your friends and also follow us by entering email for getting post alert directly on your email.


